Help
Record and Measure
Table of Contents
- Introduction
- Tips to ensure optimal data quality
- How to measure with Naos
- How to measure with Admos
- How to automatically synchronize videos
Introduction
Follow these steps and you can't do anything wrong. Read further below for more info and details.
- Switch the sensor on
- Press 1x on the on/off button.
- Measure
- Wait for 15 minutes, then give the sensor to the athlete.
- Real-time analysis (only for Naos)
- Use your smartphone or tablet and connect to the realtime webapp.
- Switch the sensor off
- Press 3x on the on/off button.
- Offline Analysis
- Add the data to the webapp and select the segments you want to analyse in-depth. All potential segments of interest are automatically detected.
What does a sensor measure?
Both the Admos and Naos sensor measure similarly and provide almost the exact same raw data:
| Measurement | Sensor | AdMos | Naos |
|---|---|---|---|
| 3D speed and position | GNSS (GPS + Galileo + BeiDou + QZSS) | 10 Hz | 10 Hz |
| 3D acceleration and angular velocity | Inertial sensor (IMU) | 200 Hz | 208 Hz |
| "Barometric elevation" | Barometric pressure sensor | 10 Hz | 12.5 Hz |
When this raw data is processed on our cloud all the different measurements (position, speed, acceleration, angular velocity, "barometric elevation") are fused (sensor fusion) and a body model is applied to obtain the center of mass kinematics at 200 Hz. This body model ensures that "parasite" movements from the upper body are "filtered out."
Tips to ensure optimal data quality
Give the sensor enough time to find satellites
The more satellites it can get, the more precise your data will be. After switching the sensor on, leave the sensor at least for 15 minutes still and under the open sky. The antenna is on the side where the LED light is. This light should point towards the open ski. Under good conditions Admos may get up to 25 satellites. Naos may get up to 30 satellites.
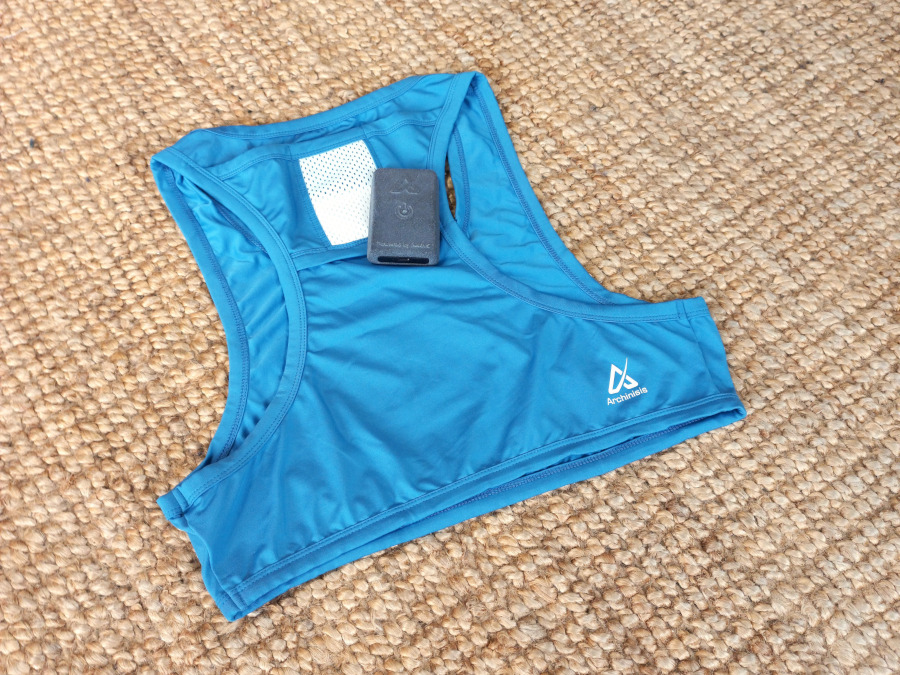
Attach the sensor correctly
We recommend to always use our shirts with the dedicated pocket for wearing the sensor. The shirts have been specifically designed and optimized for our sensors.
- When the athlete is wearing the sensor, make sure that the face with the LED light is visible. This is where the GNSS antenna is and this face needs to see the sky.
- Make sure that the sensor's longitudinal axis is well aligned with the spine's longitudinal axis and that there is no rotation. This is usually no problem when using our shirts.
- Make sure that the sensor is hold firmly in place. It should not be able to move or vibrate when the athlete is making sudden movements. This is uncomfortable for the athlete and drastically reduces data quality because of added noise.
How to measure with Naos
Overview of the LED blinking behavior:
- 1x per second
-
During a measurement: Sensor is looking to connect to the 4G/LTE network
When plugged to USB: Sensor is charging - 3x per second and then nothing
- The sensor has no more battery and switches off.
- 1x every 6 seconds
- The sensor is recording in the online mode.
- 2x every 6 seconds
- The sensor is recording in the offline mode.
- Nothing
- When plugged to USB: Sensor charging is completed
Switch the sensor on - online mode
- Press the on/off button 1x. The sensor will start blinking 1x per second. It is trying to connect to our server, via the 4G/LTE cellular connection.
- After 20 - 40 seconds the sensor will blink 1x for 3 seconds and then 1x every 6 seconds. This means that the sensor is connected and streaming data.
- If the sensor blinks 2x every 6 seconds this means that it could not connect and is recording the data locally.
The sensor is recording data as soon as it is switched on. However, all data will be discarded until there is GNSS reception. You can verify the sensor status on the webapp.
To have the maximum number of satellites, for optimal performance, we recommend leaving the sensor still for 10 - 15 minutes before you give it to the athlete. Make sure that during this time the sensor has clear sky but does not lie in the sun. If you are using multiple sensors, make sure to leave some spacing between the sensors to avoid signal interference.
Switch the sensor on - offline mode
- Press the on/off button 2x and wait for 5 seconds.
- The sensor will start blinking 2x every 6 seconds.
To have the maximum number of satellites, for optimal performance, we recommend leaving the sensor still for 10 - 15 minutes before you give it to the athlete. Make sure that during this time the sensor has clear sky but does not lie in the sun.
Switch the sensor off
- Press the on/off button 3x and wait for 4-6 seconds.
- The LED will turn on for 3 seconds and then turn off. The sensor is now off.
Download the data (offline mode only)
- Connect the sensor to a computer with the USB cable. If you only have USB-C ports, then you need a USB-C to USB-C cable to directly connect the sensor. It will not work if you use a USB-hub.
- The sensor blinks 1x per second
- Press the on/off button 1x and wait for 3-4 seconds.
- The sensor will be shown as an external hard drive. Measurement files are the .NAO files. Do not change or delete any other file. These are configuration files needed for proper functioning of the sensor.
Charging the sensor
- Connect the sensor with the USB cable to any charging device or to a USB port on your computer.
- The sensor will start blinking 1x every second: this indicates that it is charging.
- When the LED stops blinking and is always off: the sensor is 95% charged (leave charging for another 1h to get it to 100% charged).
How to measure with AdMos
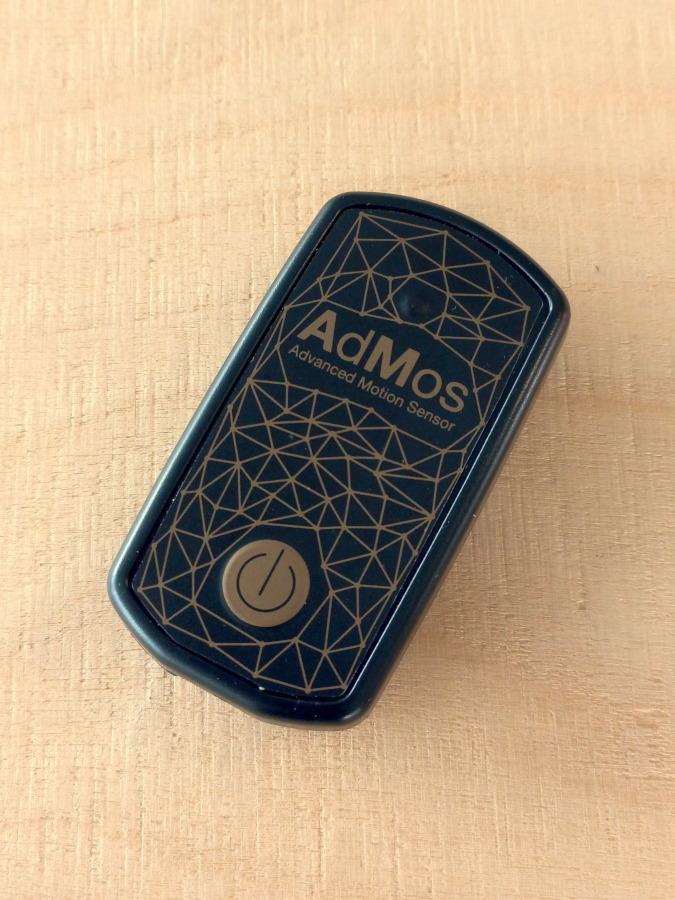
Switch the sensor on
- Press the on/off button 1x.
- The sensor will start blinking red slowly, 1x per second. It is looking for GNSS satellites.
- Once it has found satellites the sensor blinks rapidly.
The sensor is recording data as soon as it is switched on. However, the data will only be usable once it has found GNSS satellites.
The sensor may blink green: this happens when you touch the electrodes on the back. This does not influence the recording. You can safely disregard the color.
To have the maximum number of satellites, for optimal performance, we recommend leaving the sensor still for 15 - 20 minutes before you give it to the athlete. Make sure that during this time the sensor has clear sky but does not lie in the sun. If you are using multiple sensors, make sure to leave some spacing between the sensors to avoid signal interference.
Switch the sensor off
- Press the on/off button 3x.
Download the data
- Connect the sensor to the computer.
- Open Google Chrome, Microsoft Edge, or the Opera browser and go to the sensor management page.
- Click on the button "Connect" and choose the sensor.
- Download the data
- Erase the data
If you are logged in and connected to the internet while downloading the data it will be added automatically to the webapp in the background. With this you don't need to upload the file again when you create a measurement.
- Always erase the data after each measurement. The sensor has only space for about 4 hours of measurement and if it runs out of space you will lose data.
- You can only retrieve the latest measurement. If you accidentally switch on the sensor before you had the chance to download the data you have to send us the .ASI file, and we can recover the last measurement manually.
Charging the sensor
- Connect the sensor with the USB cable to any charging device or to a USB port on your computer.
- The sensor will start blinking 1x every second: this indicates that it is charging.
- When the LED stops blinking and is always on: the sensor is fully charged.
How to automatically synchronize videos

Steps to follow
- Switch the sync sensor on.
- Put it under the open sky for about 15 minutes, as with the Naos or Admos sensors.
- Connect to the camera's microphone-in connection
- Record your videos as usual. Video duration should be at least 5-6 seconds. Better 10 seconds.
When you are filming, the video sync unit can be placed in a pocket. Just make sure that the cable remains connected. You may disconnect and reconnect the cable any time you are not filming. There is no synchronization required with any other sensor. The video sync units works completely autonomously. It gets the time from the same satellites as the senors on the athlete.
Adapters
You can use any video recording device which as a microphone input. GoPro, tablets, smartphones may need an adapter (e.g. GoPro's media adapter) and you may need to change the device's video setting so that it records the sound from an external microphone.
The Boya Company (https://www.boya-mic.com/adapters) produces the following adapters:
- Boya BY-K1 for lightning interfaces (e.g., iPhones)
- Boya BY-K2 or BY-K4 for USB-C interfaces (e.g., selected Android phones, tablets)
More Info
If you want to know more about it works read our blog entry about this topic.